What Your Check Engine Light Codes Really Mean Explained
The illumination of the check engine light on a vehicle’s dashboard often prompts a mix of curiosity and concern. Modern cars are equipped with an On-Board Diagnostics system, commonly referred to as OBD-II, which continuously monitors the performance of the engine and emissions-related components. When the system detects a deviation from expected parameters, it stores a specific alphanumeric code that corresponds to the nature of the issue. Understanding what these codes represent is a fundamental step in the diagnostic process, though it is important to recognize that the code itself is only a starting point for investigation.
The OBD-II system was standardized in the mid-1990s, providing a universal framework for vehicle diagnostics across manufacturers. When the check engine light activates, a technician or vehicle owner can retrieve the stored code using a compatible scan tool. Each code consists of a letter and four digits, with the letter indicating the general system affected. For instance, codes beginning with ‘P’ refer to powertrain issues, while ‘C’, ‘B’, and ‘U’ denote chassis, body, and network-related problems, respectively. This standardized format allows for consistent interpretation, though the specific meaning of a code can vary slightly between different makes and models.
It is essential to approach any trouble code with a methodical mindset. The code is a symptom, not a diagnosis. Many factors can influence the conditions under which a code is set, including driving habits, environmental conditions, and the age of the vehicle. A thorough diagnostic process involves verifying the code, understanding the conditions that triggered it, and performing additional tests to pinpoint the root cause. This article explores several common OBD-II codes, the systems they relate to, and the typical steps taken during the diagnostic process.
Understanding the OBD-II System and How Codes Are Generated
The OBD-II system relies on a network of sensors and actuators distributed throughout the vehicle. These components measure variables such as oxygen levels in the exhaust, engine temperature, air intake, fuel pressure, and ignition timing. The engine control module, or ECM, compares these real-time readings to predefined thresholds stored in its programming. When a sensor reading falls outside the acceptable range for a specified duration, the ECM sets a Diagnostic Trouble Code (DTC) and may also illuminate the check engine light. Some codes cause the light to flash, indicating a condition that could lead to catalytic converter damage, while others result in a steady light for less urgent issues.
The process of code generation is not arbitrary; it follows a logic that considers both the severity and the frequency of the anomaly. For example, a single misfire event may not immediately trigger a code, but a pattern of misfires over a certain number of engine revolutions will. This design helps reduce false positives from transient conditions. Once a code is stored, the ECM also records a freeze frame of data, capturing the engine speed, load, coolant temperature, and other parameters at the moment the fault was detected. This freeze frame is a valuable piece of information during diagnosis, as it provides context about the operating conditions under which the fault occurred.
Understanding the categorization of codes is also helpful. Generic codes, which start with ‘P0’, are defined by the SAE (Society of Automotive Engineers) and apply universally across most vehicles. Manufacturer-specific codes, starting with ‘P1’, are unique to a particular brand and require access to proprietary service information. Similarly, codes with the second character as ‘3’ or ‘4’ indicate specific system areas. For instance, P0300 is a generic code for random or multiple misfires, while P0420 is a generic code for catalyst system efficiency below threshold. This distinction underscores the importance of referencing model-specific repair manuals alongside the code itself when conducting diagnostics.
Common Check Engine Light Codes and Their Meaning
One of the most frequently encountered codes is P0420, which indicates that the catalytic converter’s efficiency is below the threshold set by the manufacturer. The catalytic converter is responsible for reducing harmful exhaust emissions, and its performance is monitored by oxygen sensors located before and after the converter. A P0420 code suggests that the rear oxygen sensor is detecting a similar oxygen level to the front sensor, meaning the converter is not performing its chemical conversion effectively. However, this code does not always mean the converter itself is faulty. Common contributing factors include exhaust leaks, a faulty oxygen sensor, engine misfires that contaminate the converter, or even a malfunctioning air injection system.
Another common code is P0300, which indicates random or multiple misfires. Misfires occur when the air-fuel mixture in a cylinder fails to ignite properly. This code can be accompanied by specific cylinder misfire codes like P0301 through P0312, each pointing to a particular cylinder. The underlying causes for misfires are varied and can include worn spark plugs, defective ignition coils, vacuum leaks, low fuel pressure, or issues with the fuel injectors. Because a misfire can cause unburned fuel to enter the exhaust system and damage the catalytic converter, this code often requires prompt attention. Diagnosis typically involves inspecting the ignition system, checking fuel delivery, and performing a cylinder balance test.
Code P0171, which indicates a lean air-fuel mixture on bank one, is also frequently seen. A lean condition means there is too much air or too little fuel in the combustion chamber. This can result from vacuum leaks, a faulty mass air flow sensor, a failing fuel pump, or clogged fuel injectors. The ECM adjusts the fuel trim to compensate, but when the correction exceeds a certain limit, the code is stored. Similar codes such as P0174 relate to bank two in V-type engines. Diagnosing lean codes often involves smoke testing for vacuum leaks, inspecting intake hoses, and testing the mass air flow sensor output. Each of these codes provides a direction for investigation rather than a definitive repair path.
Steps to Diagnose and Address Trouble Codes
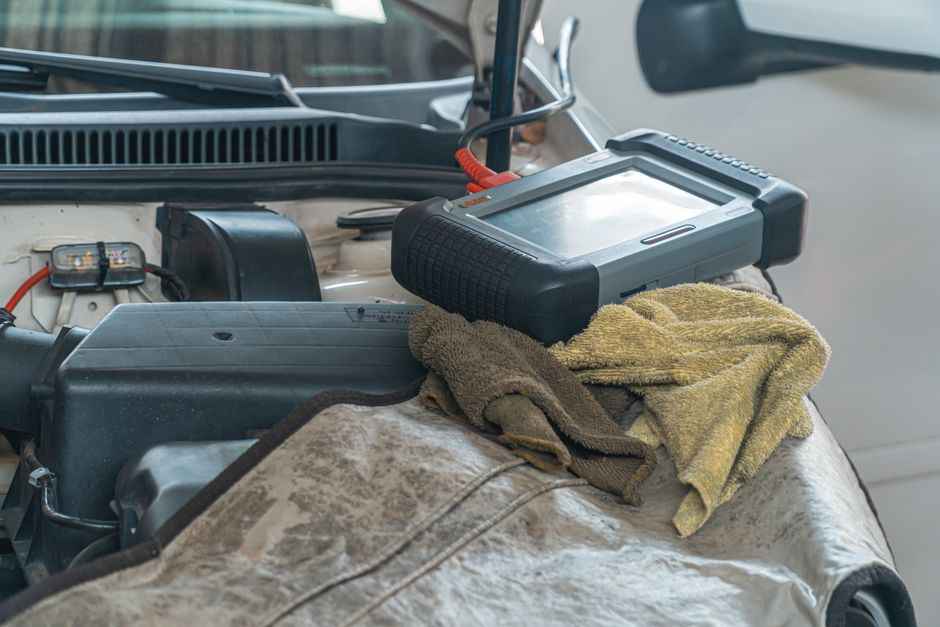
The diagnostic process begins with retrieving the code using an OBD-II scan tool. Many auto parts stores offer free code reading, but a more effective approach is to use a scan tool capable of displaying live data and freeze frame information. After noting the code and the freeze frame data, the next step is to clear the code and perform a test drive under conditions similar to those recorded in the freeze frame. This helps confirm whether the code returns, indicating an active fault, or if it was a historical issue that may no longer be present.
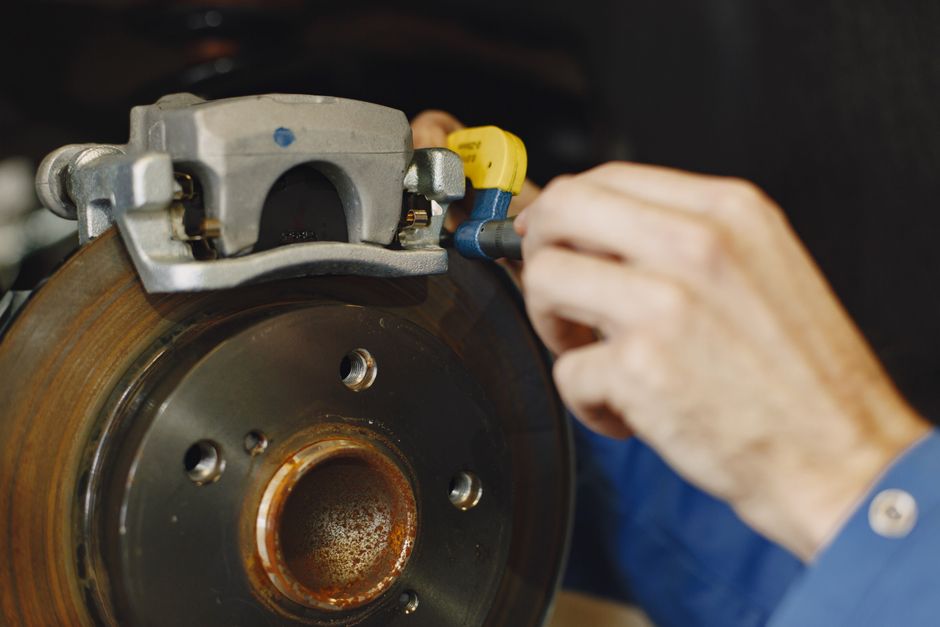
If the code reappears, the diagnostic process moves to component testing. This typically follows a logical sequence: first, inspect the related wiring and connectors for corrosion, damage, or loose connections. Second, test the sensors or actuators associated with the code using a multimeter or a more specialized diagnostic tool. For instance, when dealing with a P0420 code, the technician might monitor the oxygen sensor waveforms to see if the rear sensor is switching excessively, indicating a failed converter or an exhaust leak. For a misfire code, checking spark plugs for wear and swapping ignition coils between cylinders can help isolate the faulty component.
It is important to note that a single code can have multiple potential root causes, and replacing parts without proper verification often leads to unnecessary expense. A structured approach, such as consulting a service information system or a reputable online database, can help narrow down the possibilities based on the specific vehicle model and year. Additionally, some codes may require software updates or recalibration of the ECM, particularly in newer vehicles with advanced emissions control systems. Documenting each step and the results of diagnostic tests creates a clear record that can aid in future troubleshooting.
When to Seek Professional Assistance
While many diagnostic steps can be performed by a knowledgeable vehicle owner, certain situations warrant professional involvement. Codes related to advanced driver-assistance systems (ADAS), transmission functions, or hybrid/EV powertrains often require specialized equipment and expertise that is not available with generic scan tools. Additionally, intermittent faults that only occur under specific conditions can be challenging to diagnose without the ability to monitor live data over an extended period.
Professional technicians have access to manufacturer-level diagnostic software, oscilloscopes, and pressure testers that can provide deeper insights into system performance. They also benefit from training and experience that allows them to interpret subtle patterns in data. In some cases, the check engine light may illuminate due to a fault in a system that is not directly related to engine performance, such as a malfunctioning evaporative emissions control system (e.g., code P0455 for a large leak) or a failing transmission solenoid. These codes require a different diagnostic approach and may involve lifting the vehicle or accessing components that are not easily reached.
The role of a diagnostic service like Car Mentor is to guide vehicle owners through the process of understanding their car’s condition without making assumptions about the final outcome. By providing clear explanations of what each code means and outlining the typical diagnostic pathway, such a service helps ensure that maintenance and repair decisions are made based on accurate information rather than guesswork. The decision to proceed with repairs should always be based on a thorough analysis that considers the vehicle’s history, the cost of parts and labor, and the owner’s priorities regarding reliability and emissions compliance.
Preventative Measures and Ongoing Monitoring
Monitoring the check engine light over time can provide insights into the vehicle’s overall health. Modern OBD-II systems also support readiness monitors, which indicate whether the various emissions control systems have completed their self-tests. After a diagnostic code has been addressed and cleared, it is advisable to drive the vehicle through a standard drive cycle to allow these monitors to reset. Failing monitors can cause the check engine light to remain off even if a condition has not been fully resolved, or they can prevent the vehicle from passing an emissions inspection in states that require OBD-II readiness.
Routine maintenance plays a significant role in preventing many trouble codes from appearing. Replacing spark plugs and ignition coils at manufacturer-recommended intervals, using quality fuel, and keeping the air filter clean all contribute to consistent engine operation. Similarly, addressing minor issues such as a loose gas cap can prevent an evaporative emissions code like P0440 from appearing. While the check engine light is not a substitute for regular maintenance, it does act as an early warning system that, when interpreted correctly, can help avoid more costly repairs down the road.
Ultimately, the check engine light and its associated codes are tools that empower vehicle owners and technicians to make informed decisions. By understanding the context in which these codes are generated and the processes used to verify them, one can approach diagnostics with confidence and clarity. The goal is not to eliminate the need for professional evaluation, but to create a collaborative framework where data drives the conversation between the vehicle, the diagnostician, and the owner.